
Battle of Veertien Strome
| Battle of Veertienstrome | |||||||
|---|---|---|---|---|---|---|---|
| Part of the Second Boer War | |||||||
| |||||||
| Belligerents | |||||||
|
|
| ||||||
| Commanders and leaders | |||||||
| Strength | |||||||
|
1,655 men[1] 5 cannon[2] |
2,500 men[3] 26+ cannon[4] | ||||||
| Casualties and losses | |||||||
|
11 killed 17 wounded 3 captured |
7 killed 38 wounded | ||||||
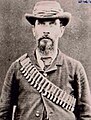
,_Boer_war_general.jpg)


The Battle of Veertien Strome (Battle of Fourteen Streams, Battle of Veertienstrome, Vaal River, 4–6 May 1900) was a military engagement in the Second Boer War fought near Warrenton, Northern Cape, by Boer troops under Sarel du Toit and British troops under Paul Methuen. Du Toit failed to prevent the British from crossing the Vaal River and entering the South African Republic from the southwest. This British move would be part of Methuen's clearing of the Orange Free State, within the overall military advance on Pretoria.[5][6]
Fourteen Streams is the broad section of the Vaal River just upstream (to the east) from the railway bridge on the Kimberley-Mafeking line where there are many islands in the river.[7][8] Sarel du Toit commanded generals Andries Petrus Johannes Cronjé, Jan Celliers, Potgieter, Piet Liebenberg for Griqualand West and Sarel Oosthuizen of Krugersdorp Commando.[9][10]
Prelude
[edit]Veertien Strome was - with Mafeking, Colesberg, Stormberg, and the Natal front - one of the positions where Boer forces were held in check at their Republics' borders by the British during the Battle of Paardeberg (18–27 February 1900).[11] After the fall of Kimberley on 15 February 1900, Sarel du Toit had on the orders of president Kruger of February 20, 1900, taken up a position up north near Veertien Strome on the Vaal River.[12] Veertien Strome is located on the border of Griqualand West and the South African Republic (Transvaal) to the north of Kimberley. The aim was, in collaboration with general J.J.M. Breytenbach and his Cape Rebels from Griqualand West, to prevent the British from crossing the Vaal River and entering the Transvaal.[13]
On March 1, 1900, A.P.J. Cronjé remarked that it was wrong to concentrate nearly all Boer forces near Modderrivierspoort (location of the Battle of Poplar Grove on March 7, 1900), where Boer troops arrived daily to protect the Orange Free State capital Bloemfontein from the advance of Frederick Roberts. Cronjé urged that he and his 300 Transvaal burghers should reinforce Du Toit.[13] After the Battle of Paardeberg, supreme general Christiaan de Wet and Philip Botha had the impression that lord Roberts would retreat from the Orange Free State and instead of occupying Bloemfontein would attack Veertien Strome and enter Transvaal to reach Johannesburg and Pretoria nearly unopposed.[14]
On April 7, 1900, Transvaal president Kruger requested Orange Free State president Steyn to move 1000 burghers from Transvaal out of their defensive position near Brandfort north of Bloemfontein to attack the railway in the back of lord Methuen and forestall his advance to Veertien Strome. However, Steyn refused.[15] Kruger was anxious that the British would break through, not in Natal, where Buller's troops posed a relatively lesser risk, but in the southwest at Norvalspont, Modderrivier, and Veertien Strome. Therefore he urged Louis Botha and his generals at the Natal front to attack fiercely, like Christiaan de Wet at Sannapos (Kroonspruit, March 31, 1900) and Mostertshoek near Reddersburg (April 3–4, 1900), forcing the British to send troops threatening Veertien Strome to Natal.[16]
On April 10, 1900, general Liebenberg arrived at the headquarters of Du Toit at Veertien Strome to support him. Du Toit reported on April 12, 1900 that Liebenberg was acting general for Griqualand West.[17] In the meantime, Methuen had restored the destroyed railway from Kimberley to Veertien Strome halfway on March 11, 1900, and 300 of his men appeared on March 16 at the destroyed railway bridge near Warrenton over the Vaal River, mounting to 3000 with an artillery battery on March 18.[18] However, kommandant (commander) F.J. Potgieter, who temporarily replaced Du Toit on his sick leave, drove the British back to Doringfontein, south of Warrenton, on 29 March 1900, out of reach of the Boer canon.[19] There was a rumor that Methuen intended to cross the Vaal River with 10,000 men near Christiana to the east.[20]
Battle
[edit]However, on May 4, 1900, British troops crossed the Vaal River near Windsorton to the southwest of Veertien Strome and picked a fight with the 200 Griqualand West Rebels protecting the ford, but at first their commander Visser reported that the attack had been repulsed, causing Du Toit to underestimate the situation.[21] The next day, Visser reported that a massive advance was at hand. At a late stage, Du Toit sent in reinforcements. After general Archibald Hunter had crossed the Vaal and dislodged the western flank of the Boer position at Veertien Strome, Du Toit had to withdraw.[22]
Quote
[edit]At 3.30 pm on May 6, 1900, general Du Toit sent president Kruger the following telegram:
- Confidentieel. Vijand heeft Veertienstroom in bezit genomen. De overmacht was voor onze burgers te sterk en daar de vijand aan deze zijde der rivier opkwam en wij van Warrenton hevig gebombardeerd werden, waren onze burgers verplicht hun posities hier op te geven. De verschillende commando's zijn nu zeer uit elkander zoodat ik deze eerst moet reorganiseren. Wij zullen morgen krijgsraad houden om andere posities in te nemen. De overmacht des vijands schijnt zeer groot te zijn. Zij hebben over de 26 kanonnen. [etc.] |
- Confidential. The enemy took Fourteen Streams. The superior forces were too strong for our burghers and as the enemy came up this side of the river and we were heavily bombarded from Warrenton, our burghers were forced to abandon their positions here. The various commands are now very far apart so I have to reorganise them first. We will hold a council of war tomorrow to decide on new positions. The enemy's superior forces seem to be very big. They have more than 26 guns. [etc.] |
| —Boer general Sarel du Toit to Transvaal supreme commander and president Paul Kruger, 6 May 1900[22] |
Aftermath
[edit]In view of the failure of Du Toit and the other present military leaders to reinforce the Cape Rebels in time, the Transvaal commander-in-chief accepted general Koos de la Rey's proposal on May 8, 1900, to transfer Du Toit to the western front to command the Boer forces there. Du Toit resisted but had to acquiesce.[23]
-
 General Andries Petrus Johannes Cronjé (1849–1923)
 -
 "Vaal River Bridge at Fourteen Streams blown up by the Boers", The Graphic, 28 October 1899.
 -
 Damaged railway bridge in the Second Boer War at Veertien Strome (Fourteen Streams) near Warrenton, around 1900.
 -
 Railway bridge at Veertien Strome, destroyed by the Boer military, Boer War 1899–1902.
 -
 Transport of an English observation artillery balloon at the Battle of Veertien Strome, Penning, 1901
 -
 The wide Vaal River at Veertien Strome (Fourteen Streams). Drawing in Penning, 1901.
_with_ammo.jpg)

,_South_Africa,_around_1900.jpg)


References
[edit]- ^ Breytenbach V (1983), p. 391.
- ^ Breytenbach V (1983), p. 329.
- ^ Breytenbach V (1983), p. 490.
- ^ Breytenbach V (1983), p. 495.
- ^ Breytenbach V (1983), p. 488-497.
- ^ Conan Doyle, Arthur (May 1902). "The Great Boer War - Chapter 25". Wikisource. Retrieved 1 October 2024.
- ^ Lunderstedt, Steve (23 December 2019). "Today in Kimberley's history 23 December". kimberley.org.za. Kimberley City Info. Archived from the original on 2 October 2023. Retrieved 24 September 2024.
- ^ Unidentified: Engineer. "Rail bridge over the Vaal River at Veertien Strome (Fourteen Streams) - First Warrenton, Northern Cape". artefacts.co.za. Artefacts, the Built Environment of Southern Africa. Retrieved 24 September 2024.
- ^ Penning, Louwrens (1901). "De oorlog in Zuid-Afrika. De strijd tusschen Engeland en de verbonden Boeren-republieken Transvaal en Oranje-Vrijstaat in zijn verloop geschetst. Deel 2. Bij Veertienstroomen. Page 727". dbnl.org (in Dutch). D.A. Daamen, Rotterdam 1901; Digitale Bibliotheek voor de Nederlandse Letteren. Retrieved 26 May 2023.
- ^ Breytenbach V (1983), p. 346.
- ^ Breytenbach IV (1977), p. 387.
- ^ Breytenbach V (1983), p. 327.
- ^ a b Breytenbach V (1983), p. 16–17.
- ^ Breytenbach V (1983), p. 31-33.
- ^ Breytenbach V (1983), p. 292.
- ^ Breytenbach VI (1996), pp. 47, 55, 65, 80, 83, and 112.
- ^ Breytenbach V 1983, p. 346.
- ^ Breytenbach V (1983), p. 355-356.
- ^ Breytenbach V (1983), p. 355-357.
- ^ Breytenbach V (1983), p. 358.
- ^ Breytenbach V (1983), p. 491.
- ^ a b Breytenbach V (1983), p. 495.
- ^ Breytenbach V, p. 495-497.
Literature
[edit]- Breytenbach, J. H. (1969–1996). Die Geskiedenis van die Tweede Vryheidsoorlog in Suid-Afrika, 1899–1902 [The History of the Second War of Independence in South Africa, 1899–1902] (in Afrikaans). Pretoria: Die Staatsdrukker.
- Breytenbach, J. H. (1977). Die Boereterugtog uit Kaapland [The Boer retreat from the Cape Colony]. Die Geskiedenis van die Tweede Vryheidsoorlog in Suid-Afrika, 1899–1902 (in Afrikaans). Vol. IV. Pretoria: Die Staatsdrukker. OCLC 249019723.
- Breytenbach, J. H. (1983). Die Britse Opmars tot in Pretoria [The British advance to Pretoria]. Die Geskiedenis van die Tweede Vryheidsoorlog in Suid-Afrika, 1899–1902 (in Afrikaans). Vol. V. Pretoria: Die Staatsdrukker. ISBN 9780621083606. OCLC 769254652.
- Breytenbach, J. H. (1996). Die beleg van Mafeking tot met die Slag van Bergendal [The siege of Mafeking up to the Battle of Bergendal]. Die Geskiedenis van die Tweede Vryheidsoorlog in Suid-Afrika, 1899–1902 (in Afrikaans). Vol. VI. Pretoria: Die Staatsdrukker. ISBN 9780797033214. OCLC 813492747.
- Penning, Louwrens (1901). "Deel 2. Bij Veertienstroomen." [Part 2. At Fourteen Streams]. De oorlog in Zuid-Afrika. De strijd tusschen Engeland en de verbonden Boeren-republieken Transvaal en Oranje-Vrijstaat in zijn verloop geschetst [The war in South Africa. The struggle between England and the allied Boer republics of Transvaal and Orange Free State outlined in its course] (in Dutch). D.A. Daamen, Rotterdam 1901; Digitale Bibliotheek voor de Nederlandse Letteren. pp. 722–729. Retrieved 26 May 2023.